My husband, Alex, and I bought our first home in May 2018. It’s a small ranch in great shape; we wouldn’t have had to change a thing, but we wanted to make it ours. We decided to tackle the kitchen and dining room first for a few reasons:
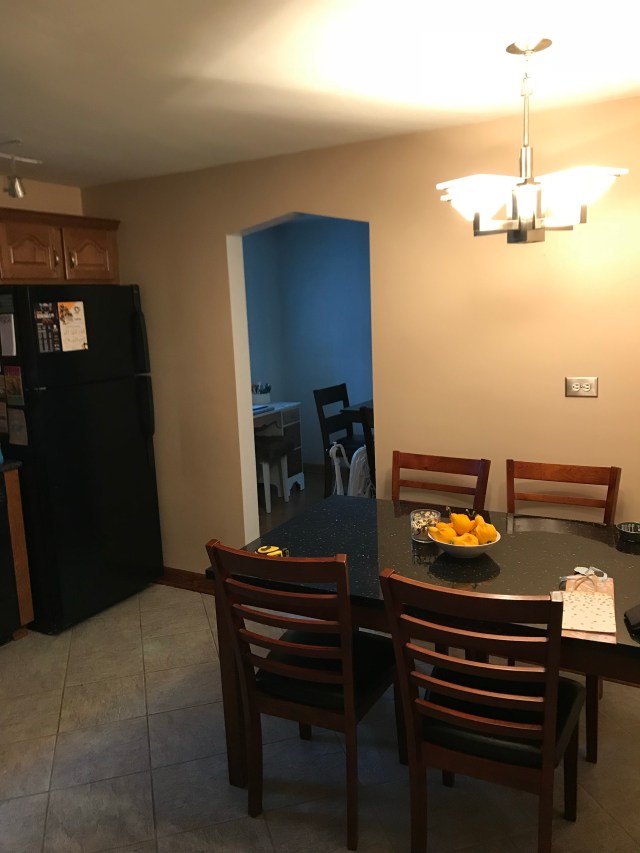
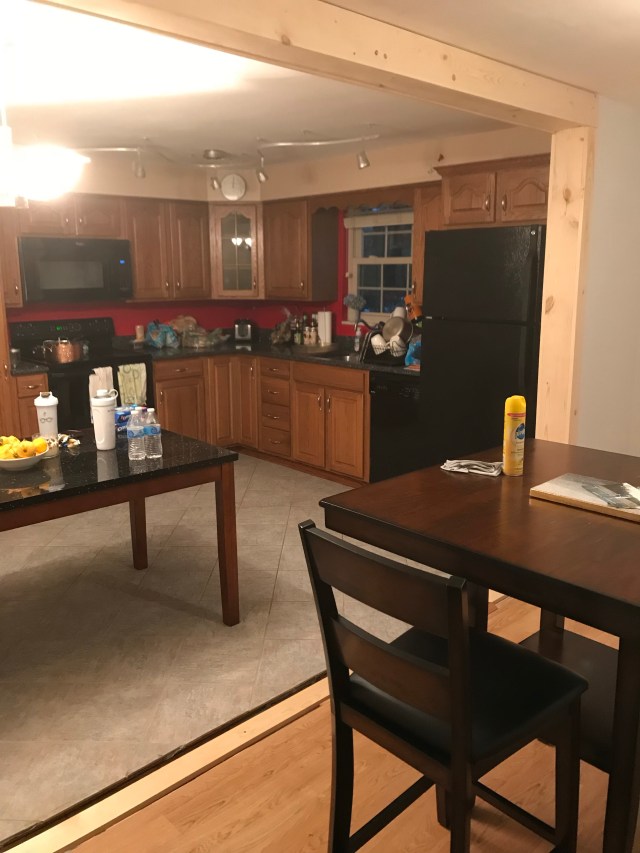
- There was a wall between the kitchen and dining room that made both rooms feel extremely small and suffocating. I like open spaces and we both like to cook and bake. We knew we’d spend a lot of time in these rooms and wanted them to feel open and inviting. Before we even bought the house, I made sure the wall wasn’t a weight-bearing one so we could knock it down.
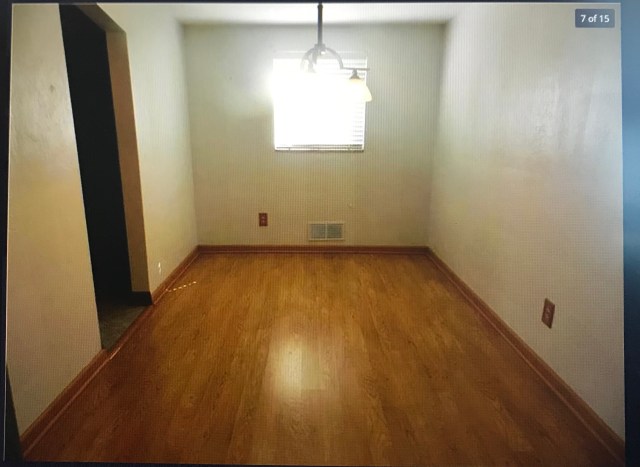
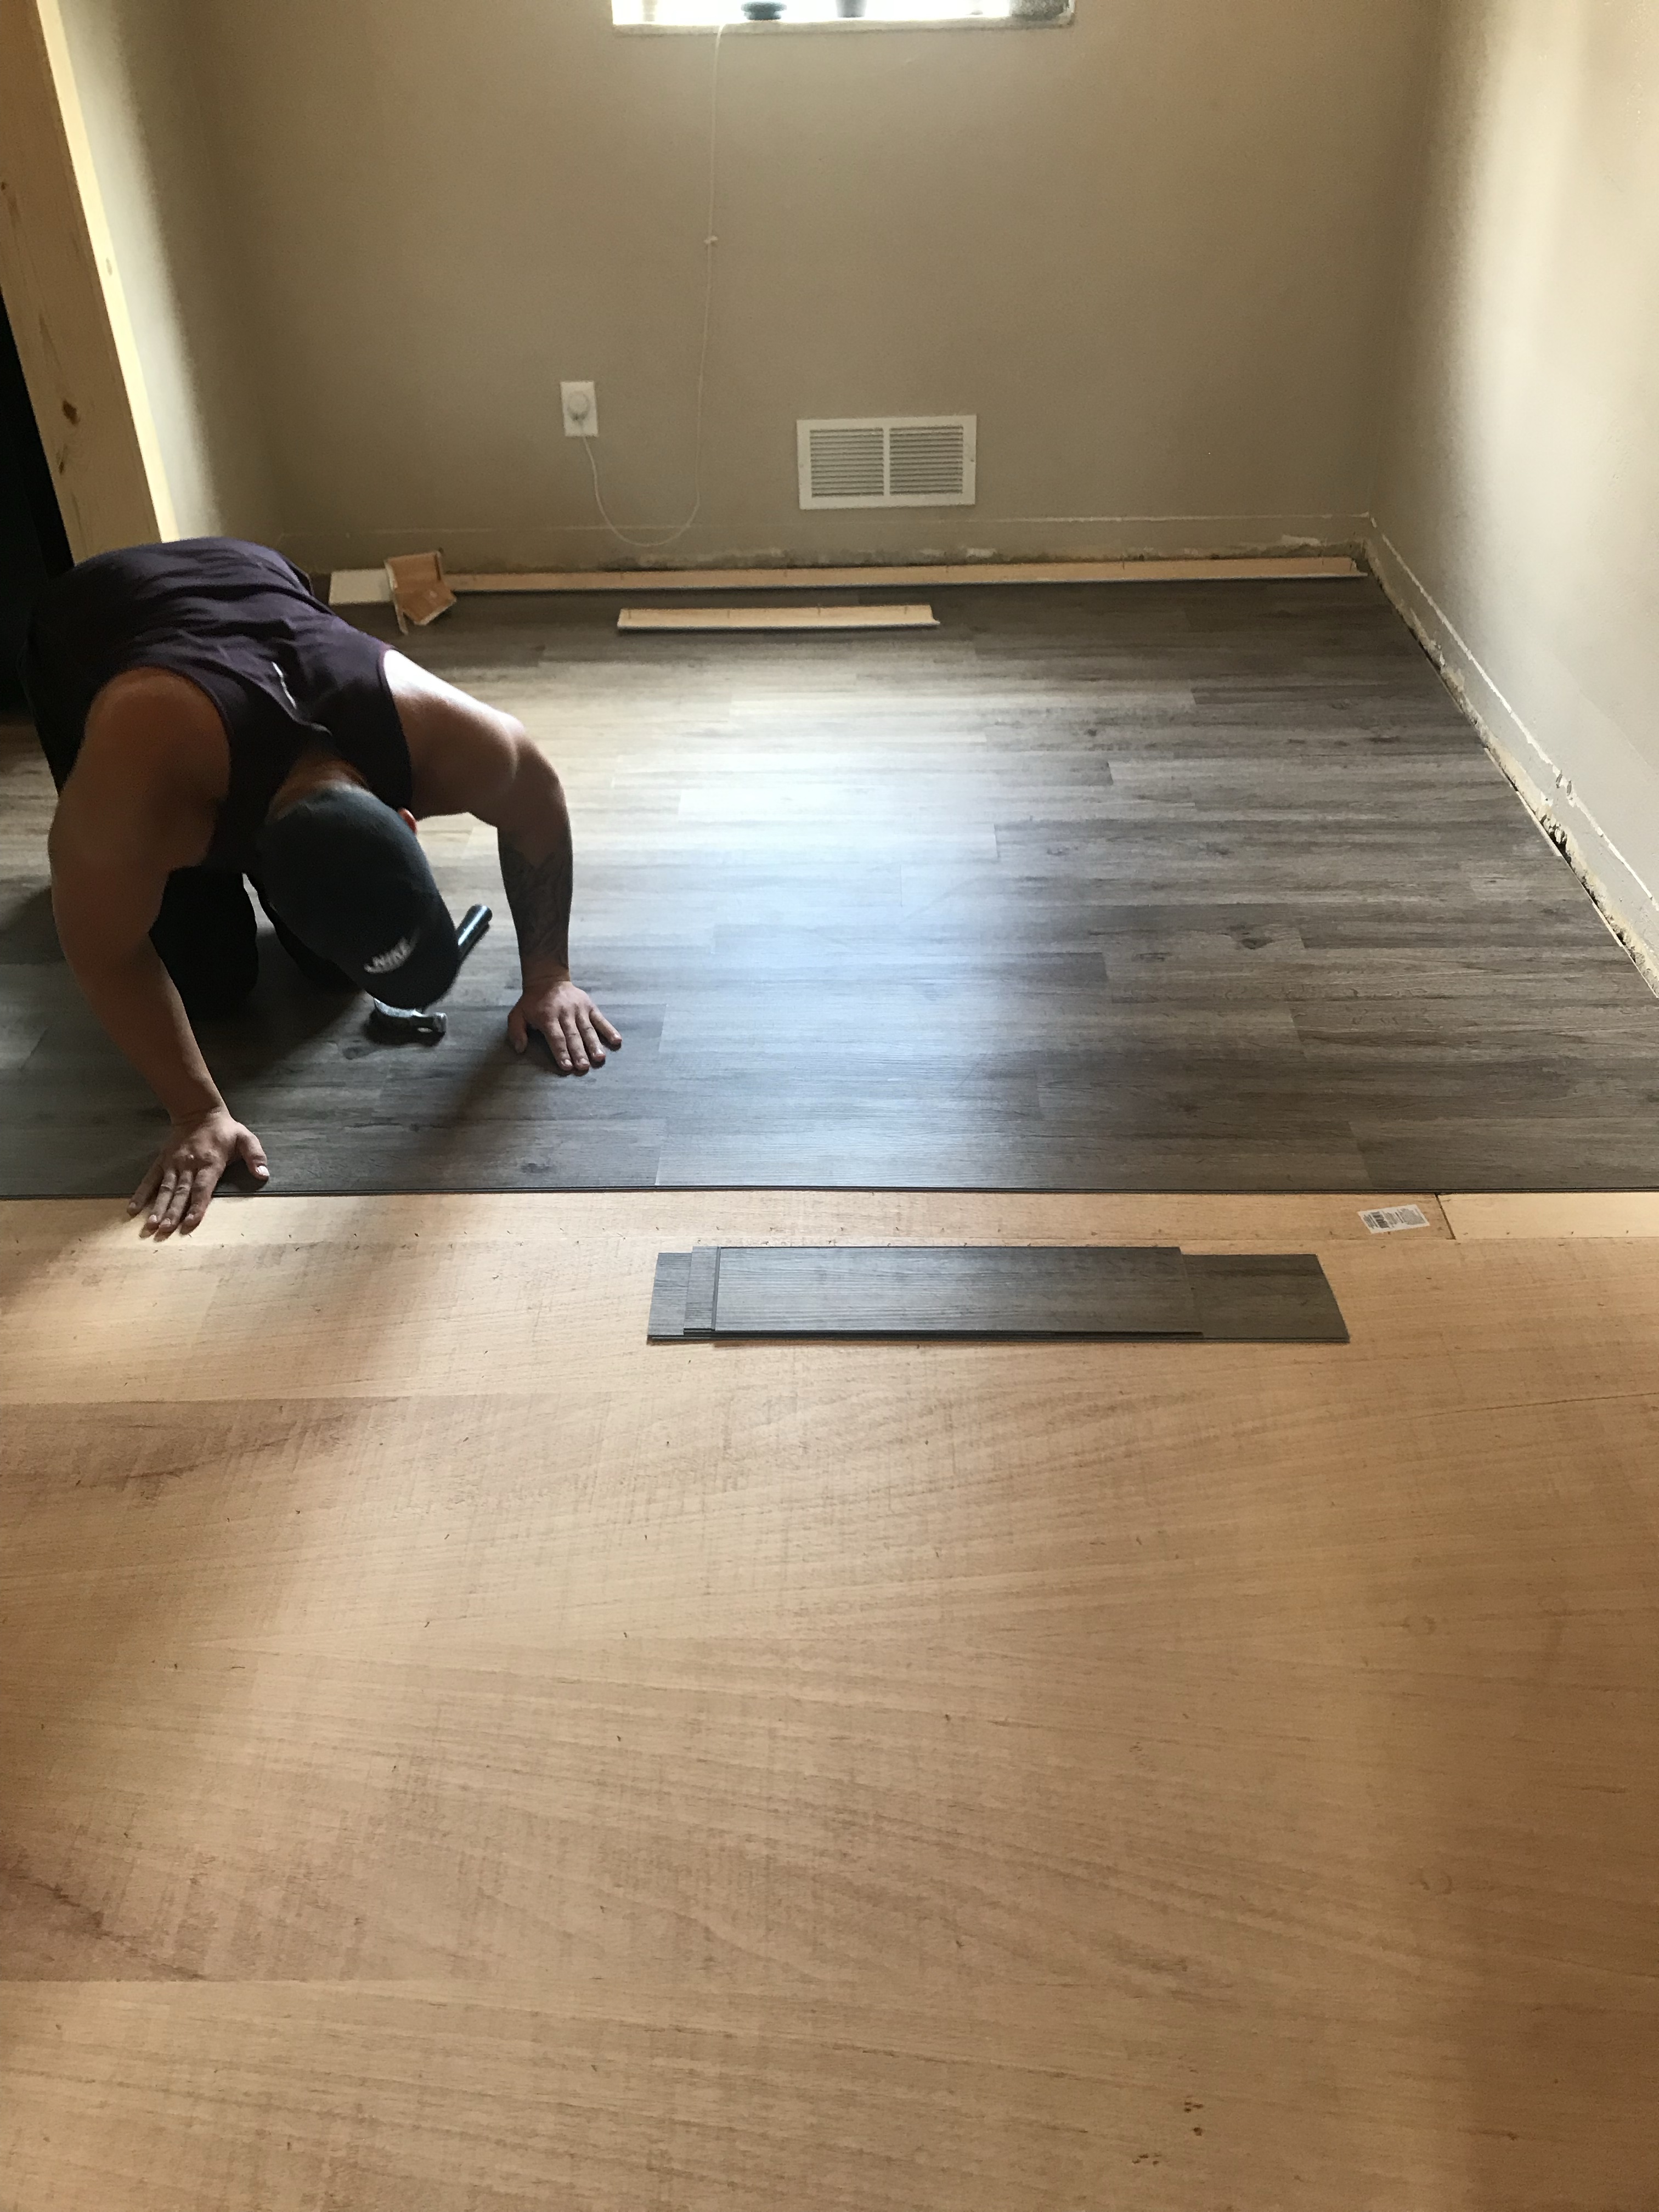
- While most of the house had original hardwood floors, which I loved, the dining room had cheap wood flooring that didn’t match … and it drove me nuts. The kitchen floor was tiled, and while it wasn’t ugly, we didn’t love the look and feel of it. It was rough and never felt clean. And, as soon as that wall came down, we’d be left with two different floors in one room, so we had no choice but to rip it up, too.
Getting Started
You need two things to get started: a positive attitude and helping hands. It can be daunting to redo anything, let alone two major rooms in your house. It takes time, money, hard work, and lots of tears, so you have to start out in the right frame of mind. The sooner you can come to terms with a messy house, a dent in your bank account, and long days, the better off you’ll be. It’s something I struggled with throughout the process, especially because it was our first time doing anything like it, but it’s worth it in the end. And now our list of projects just keeps growing 😉
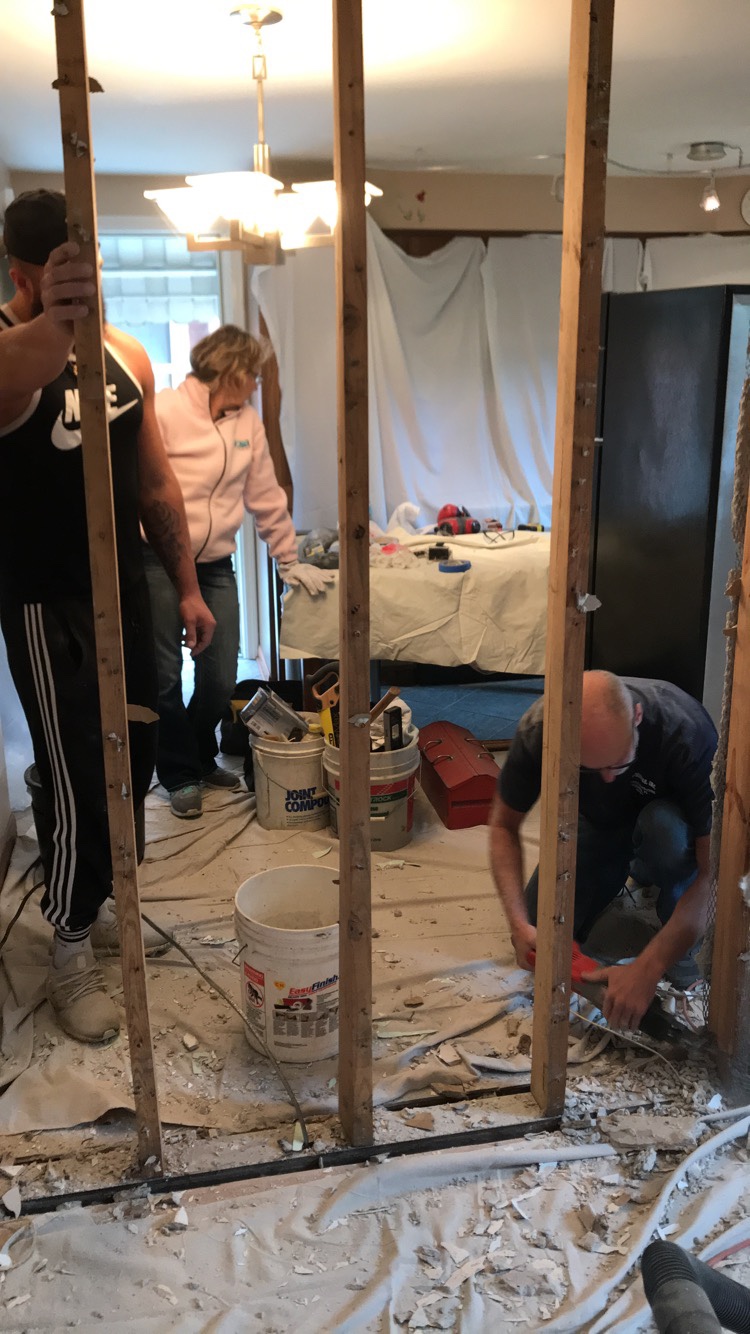
As for helpers, we definitely couldn’t have done it without my parents. They were such a huge help to us throughout the entire project. My dad is by far the best handyman I’ve ever known, and my mom works so hard she puts the rest of the world to shame. They made countless trips (two hours one way) and spent many nights at our place to help us make this happen, and we can’t thank them enough.
Demo Day
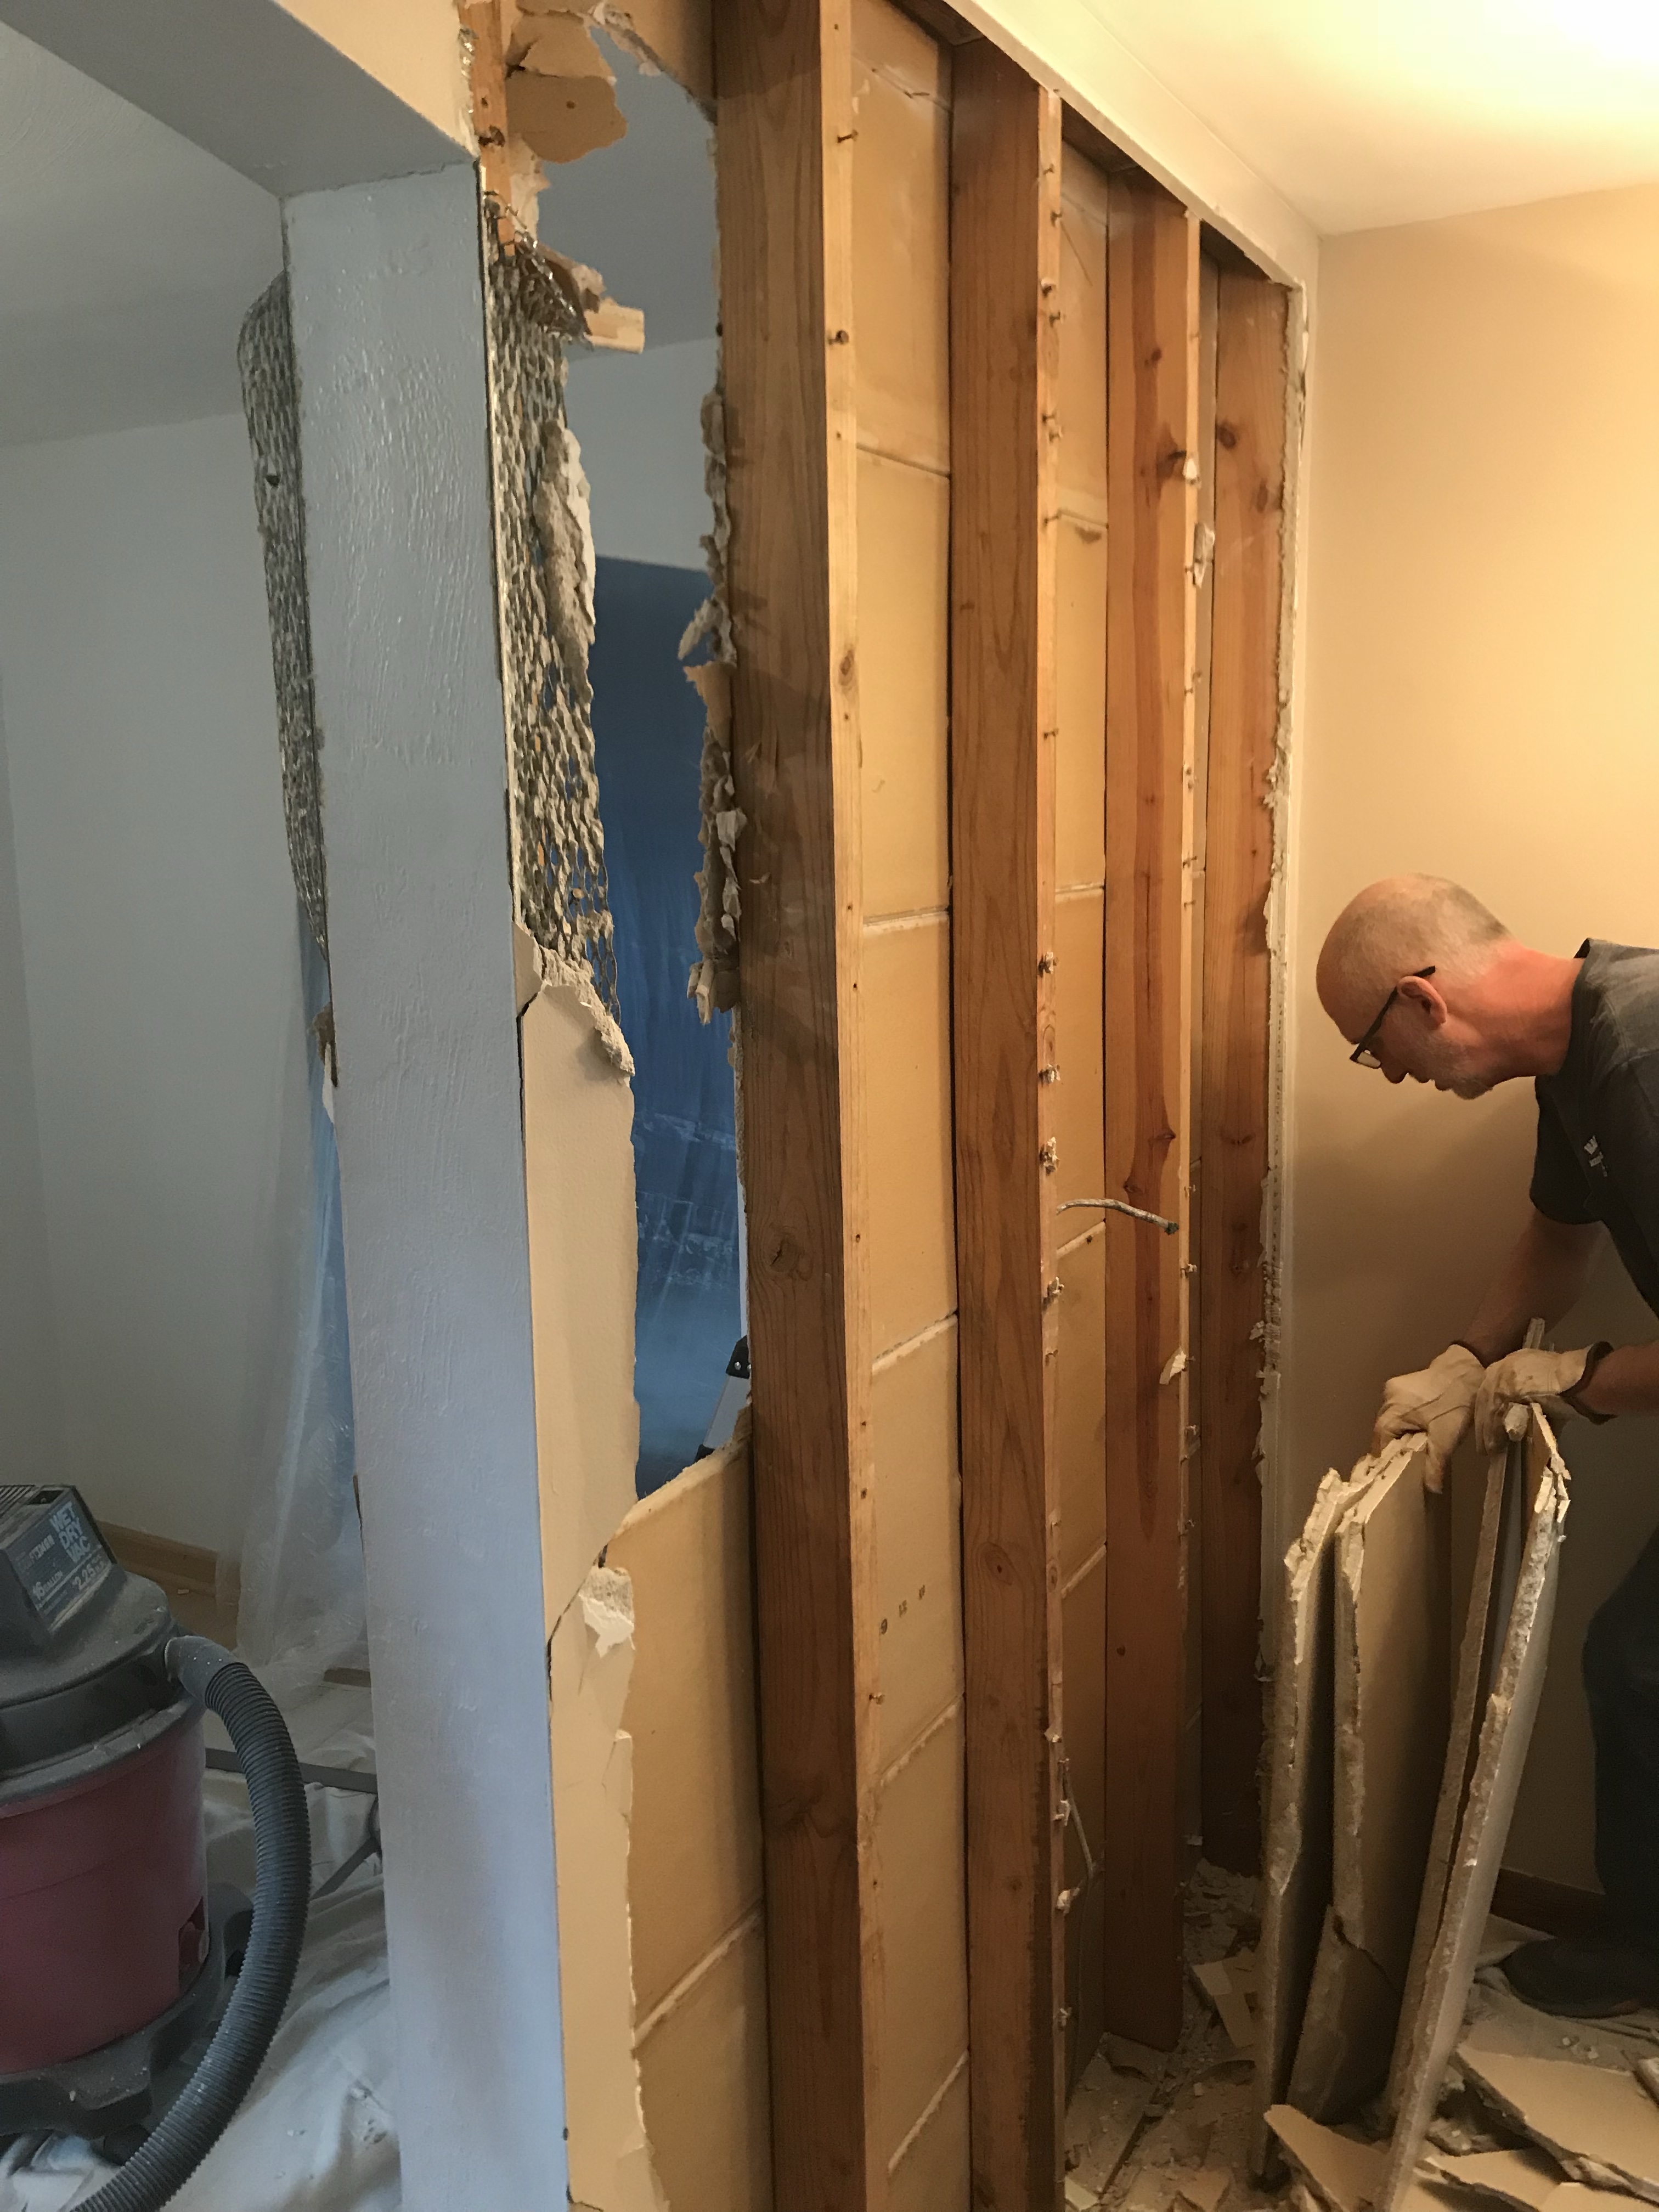
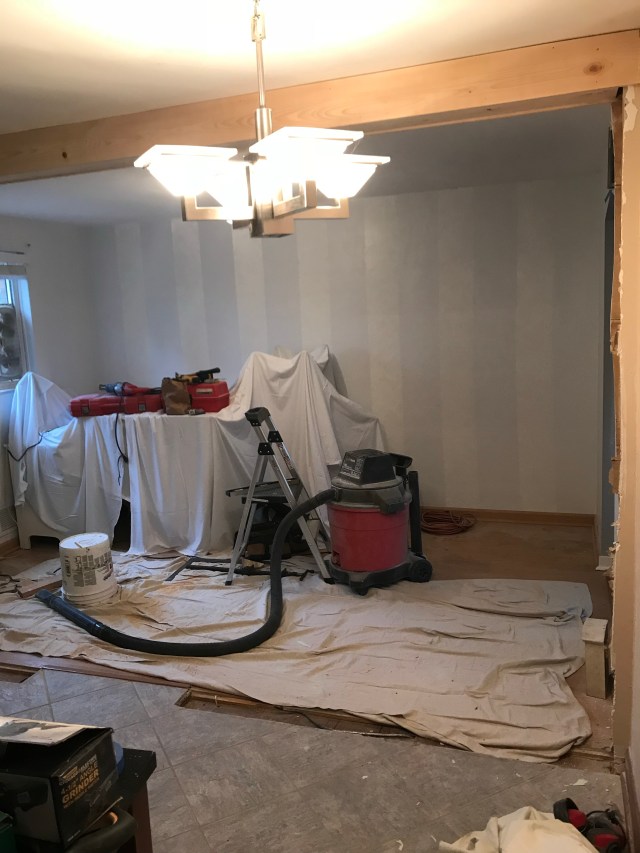
One of the quickest parts of the entire project was demo day where we knocked down the wall. It’s a great first step because it was relatively easy to do and yet it makes a drastic difference. Who doesn’t love big results for little effort?
We saved a lot of time on demo day by measuring the length and width of the opening beforehand. We wrote down measurements and my dad was able to create a fake beam out of pine to cover up the busted walls after we knocked the wall down. You can also see in the bottom picture how we stuck small 1x4s between the different floorings so we didn’t have a gap. Both of these things made the rooms livable until we had time to rip up both floors.
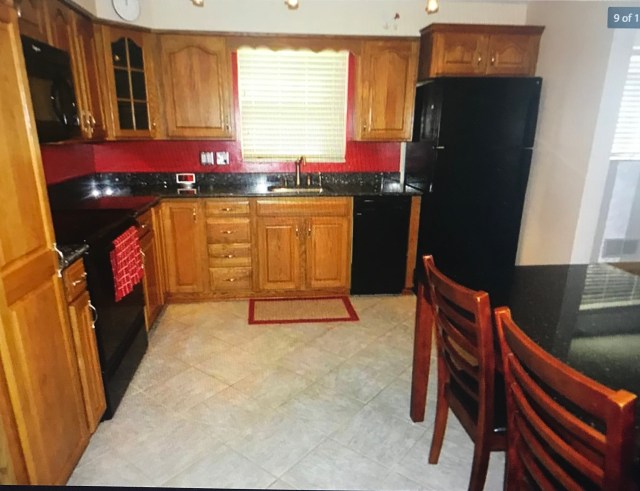
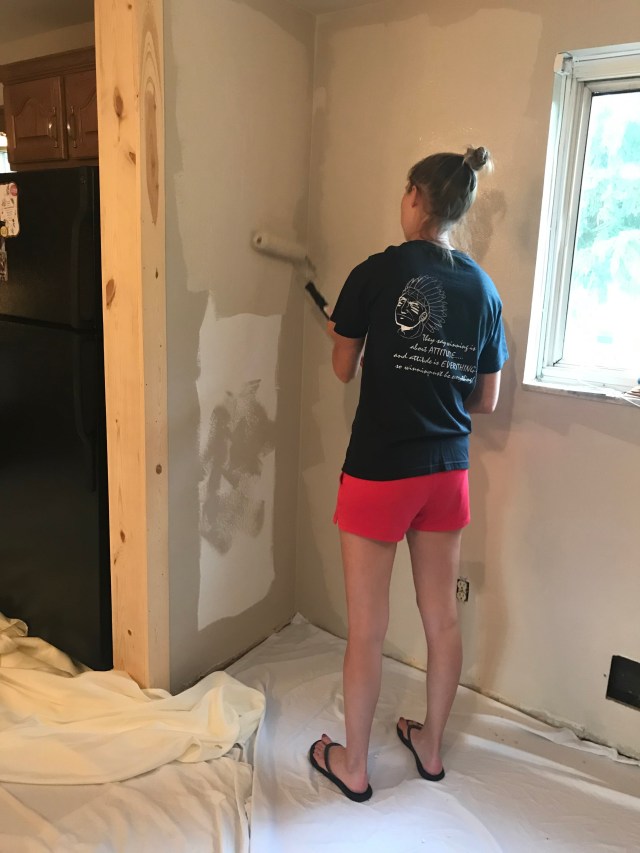
After we knocked down the wall, we spent a lot of time at Lowe’s, ha. We had to get rid of the awful red paint in the kitchen and the awful stripes (yes, you read that correctly) in the dining room. Proof:
We used Sherwin Williams paint in Bungalow Beige. If you’re looking for a subtle, yet noticeable neutral, it’s a great shade. We used a satin sheen for the walls and a flat sheen for the ceiling. We also went one shade lighter for the ceiling per my dad’s recommendation. I had no idea you used different shades and sheens of paint on walls vs. ceilings, so I’ll add it to the list of the many things I learned on this journey!
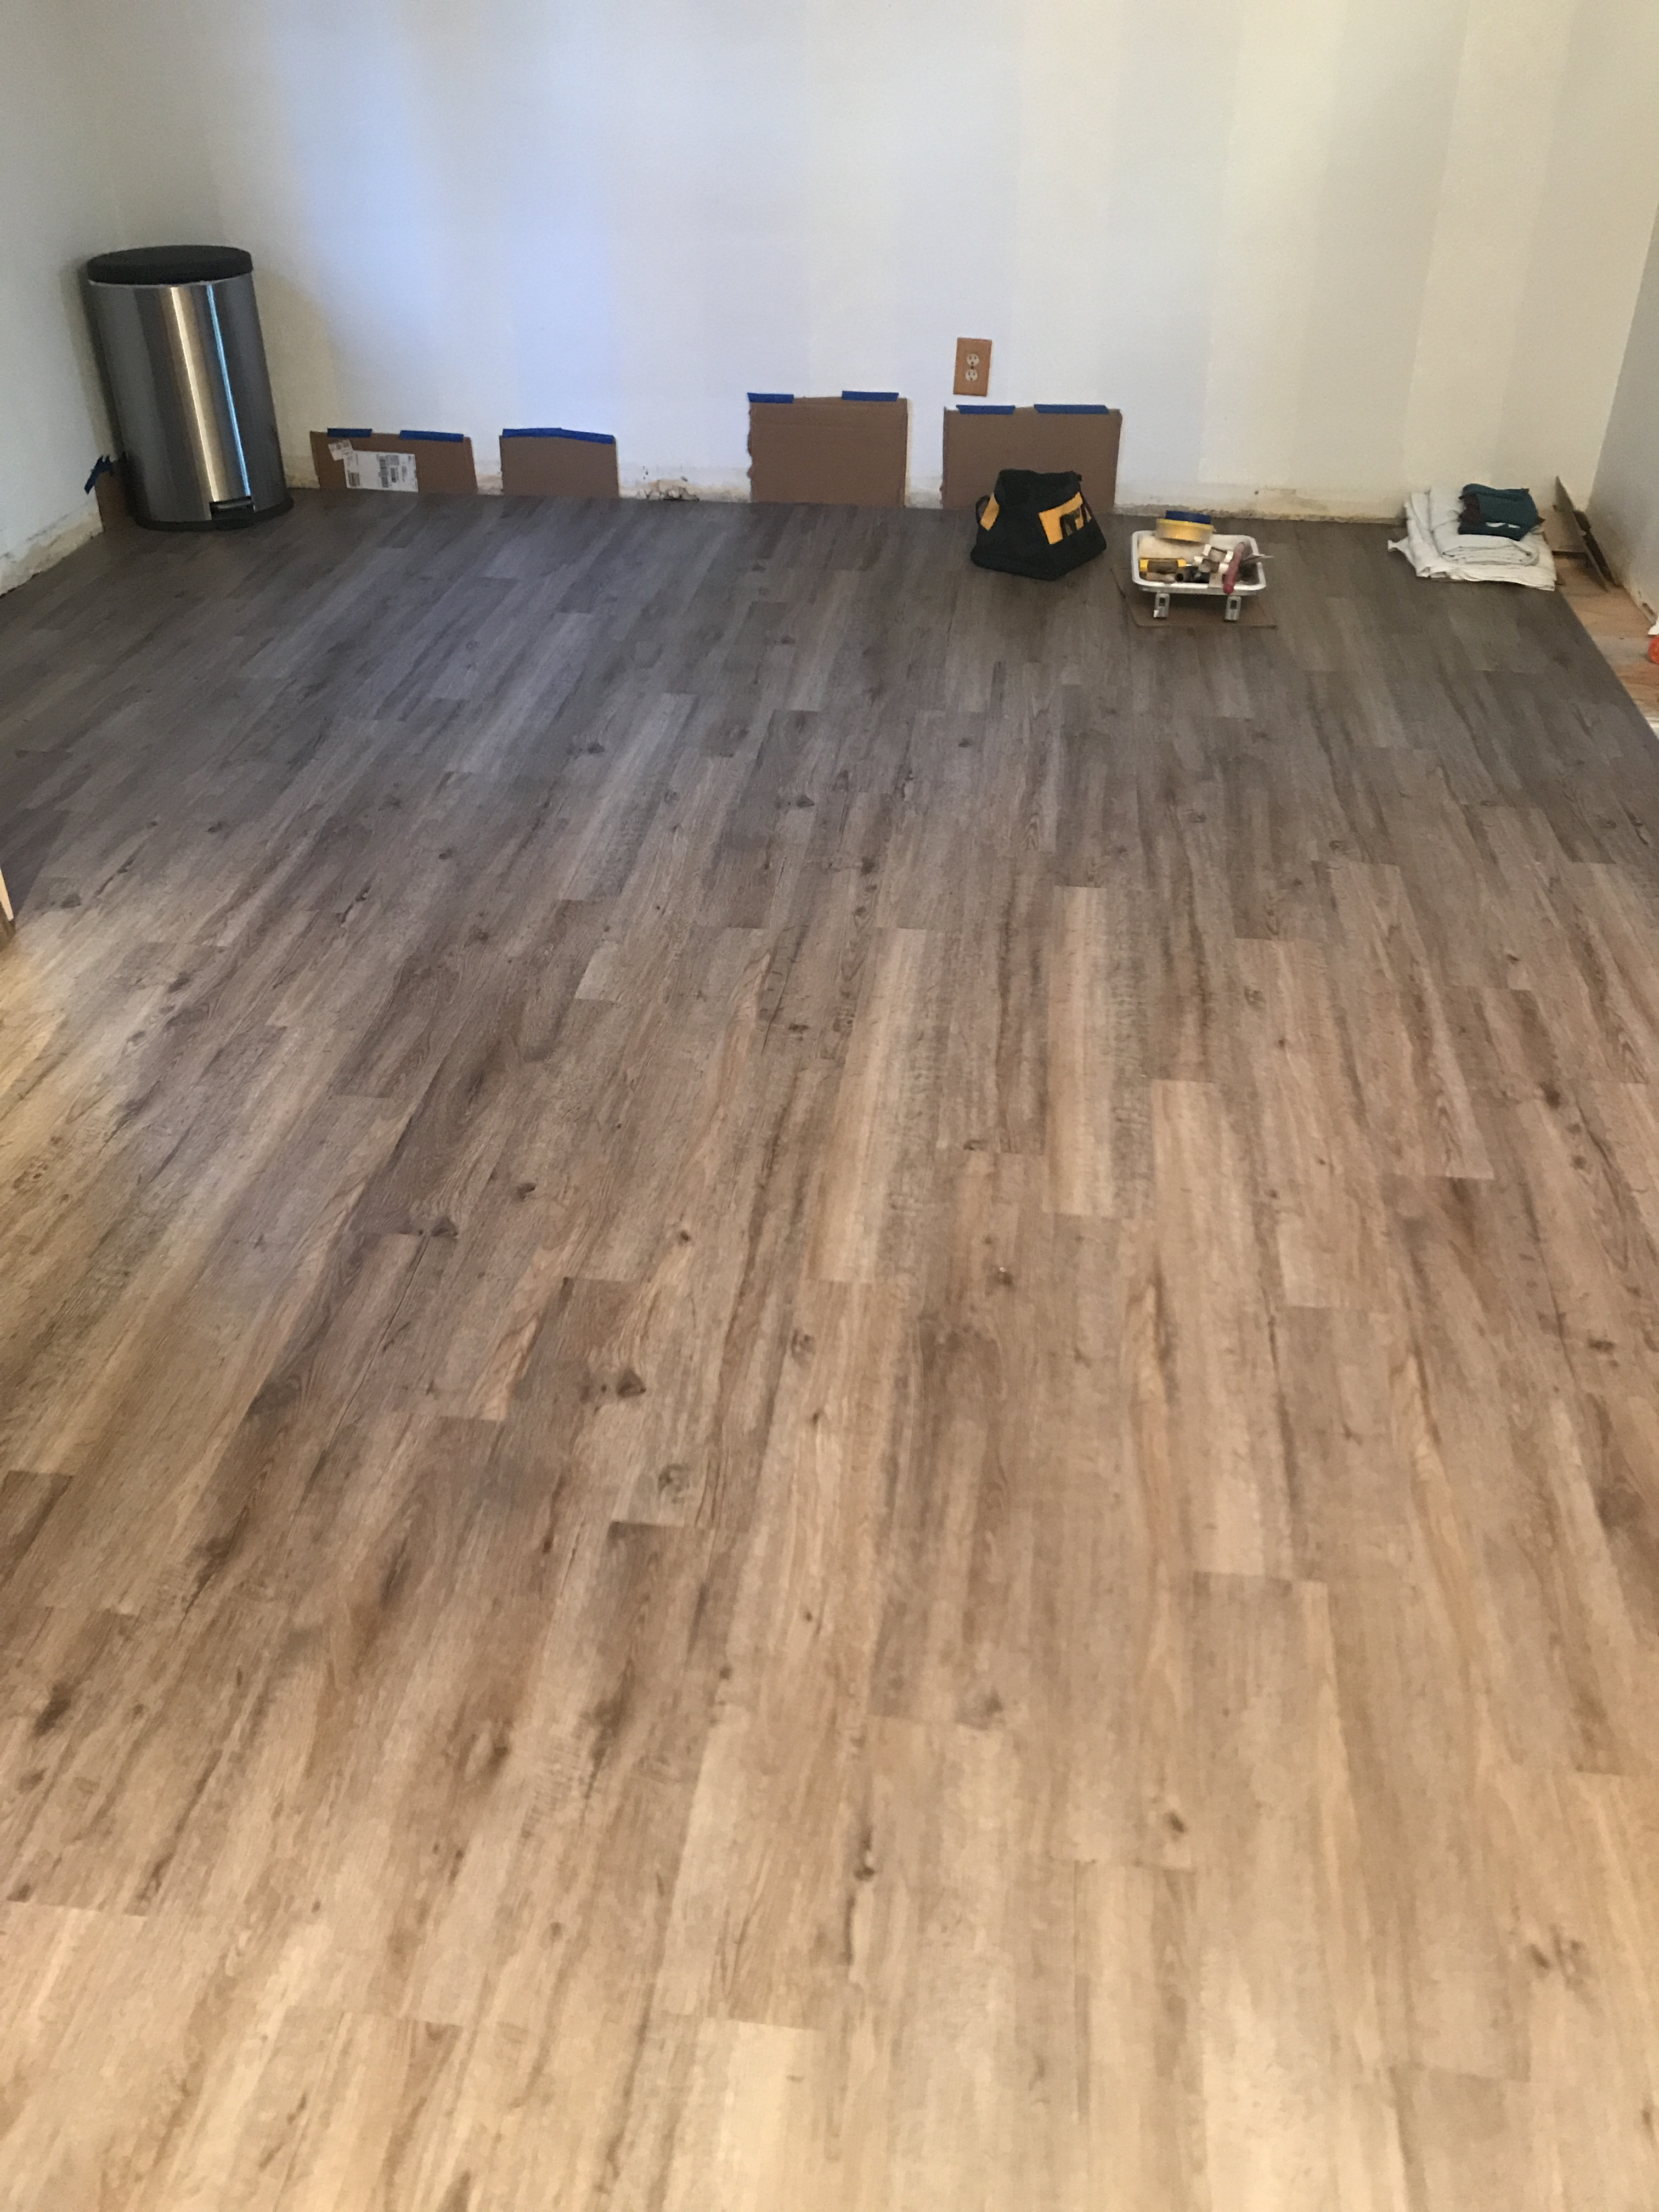
We didn’t want to pick a top-of-the-line flooring because it’s our starter home, not our forever home, and we tried to be cautious of how much money we put into it to make sure we get a return on our investment. We went with this ProCore locking vinyl for easy installation. I loved the Heirloom Oak color because it had both gray and brown tones (there was something about the all gray flooring that I didn’t like). Alex was able to snap the pieces into place pretty easily. Our major mistake: not laying new sub-flooring the first time around. I know, I know, it seems like a “duh” moment, but we were trying to cut costs and the living room sub-floor was in great shape. It was the kitchen sub-floor that gave us issues. It had so many nails in it … and even though we pounded and pounded them down, they started coming up through the new flooring. We had to tear it all up, lay new sub-flooring, and lay it all back down. I cried many times, but we learned our lesson: some things are worth paying for the first time around.

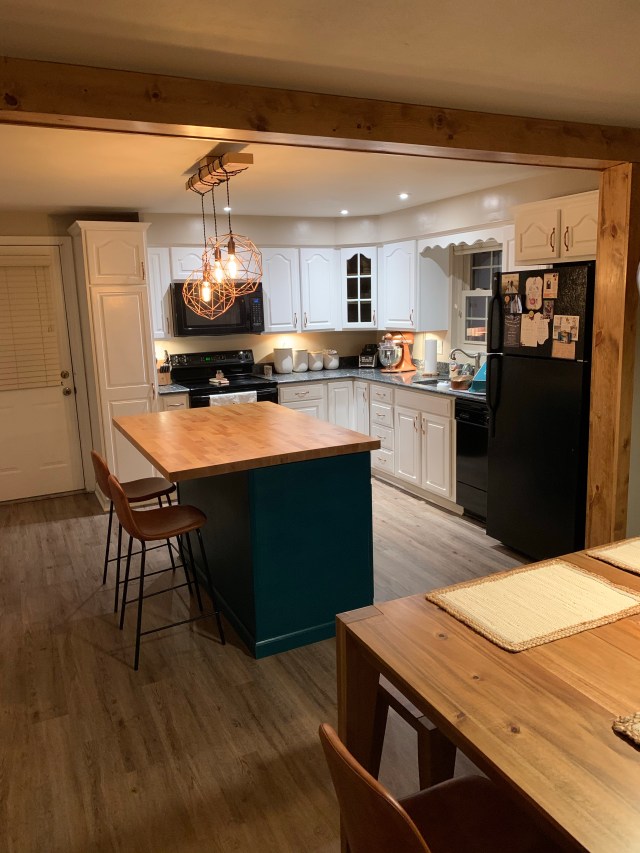
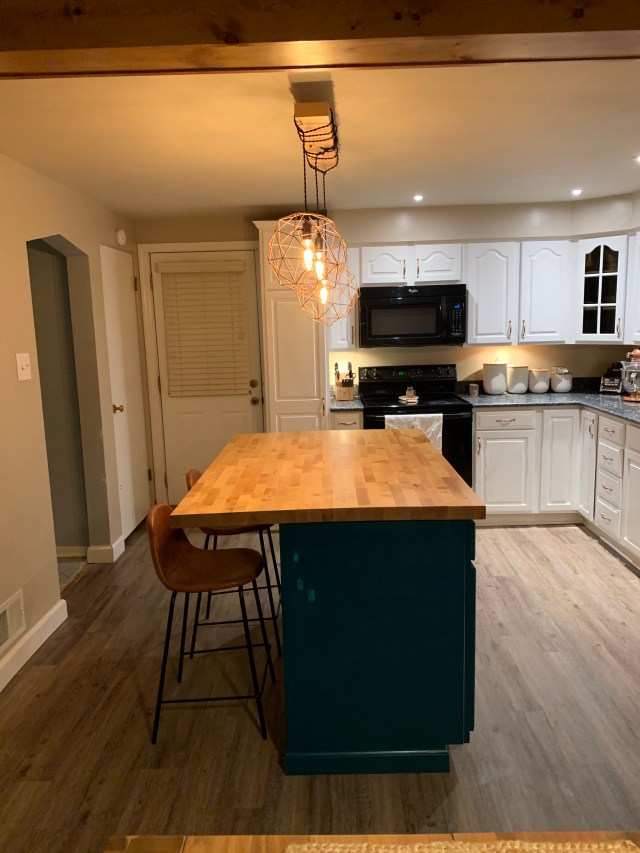
The Island and Cabinets
We decided to put in an island for more storage space. I read several blogs, looked into buying a few, and then decided to build our own (shocker!). I’m just thankful Alex and my dad are willing to follow through with all of my ideas. My sister helped me visualize it and buy all of the supplies. After we got everything home, it only took about two-three hours to put together. We used:
We put several coats of Polyurethane on the butcher’s block and absolutely love how it turned out.
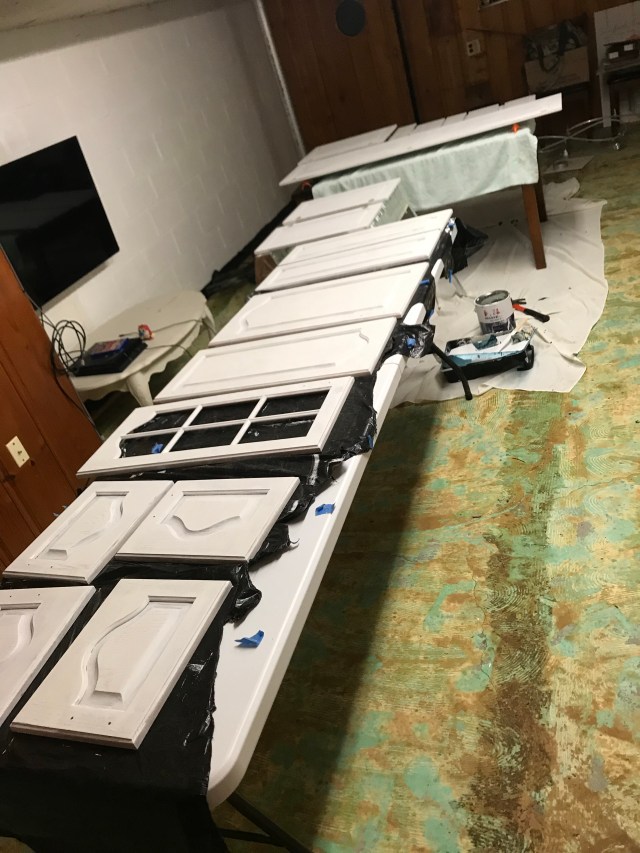
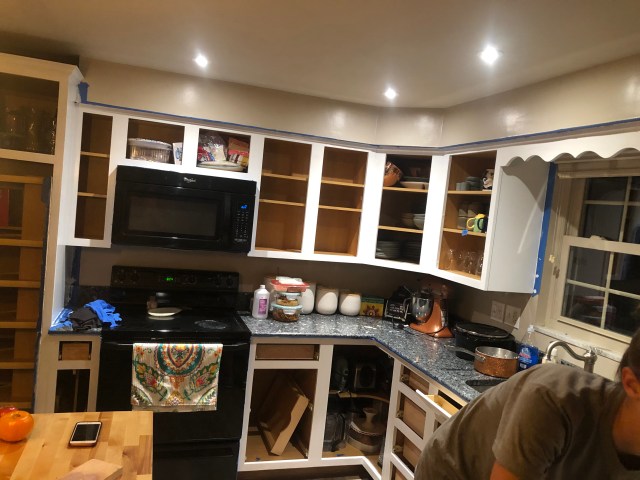
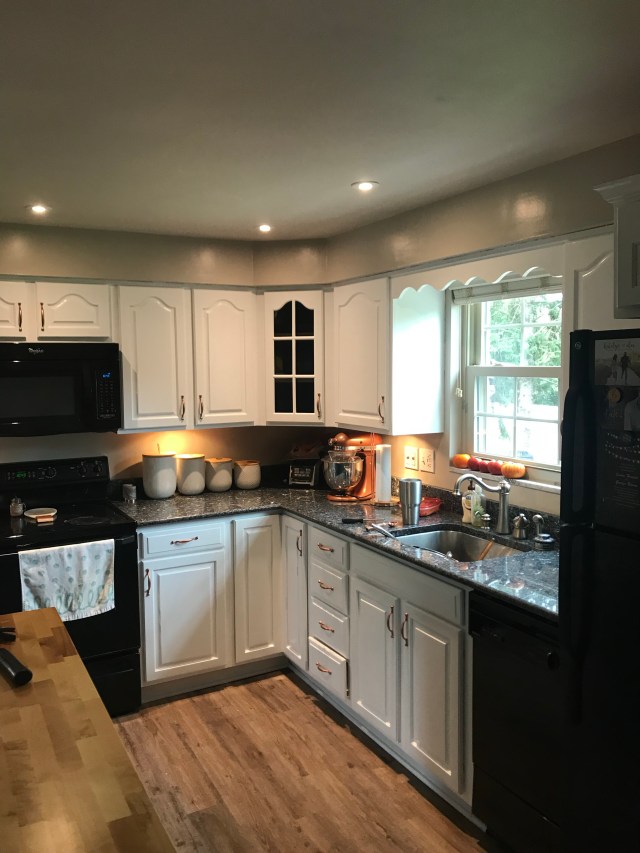
I also took it upon myself to paint our wood cabinets white. There was nothing wrong with them; I simply like the look of white cabinets better. After days of sanding, priming, and painting, I’m not sure I would recommend it. It’s a huge undertaking. I whined about having to put on more coats for days. If you’re up for the challenge, I would definitely recommend buying an electric sander (we bought a DEWALT Random Orbit Sander), using primer, and enamel paint. Even after a coat of primer, I had to put on three coats of paint. The biggest pain was sanding the base of the cabinets in the kitchen itself because we had to empty every single cabinet and the saw dust made a big mess. To cut costs, I also primed and spray-painted our existing cabinet hardware copper. It’s too early to tell how well they’ll hold up, but it was worth a shot. Was painting the cabinets worth it? I’m not sure I can say yes, but I do like my white cabinets, so that has to count for something.
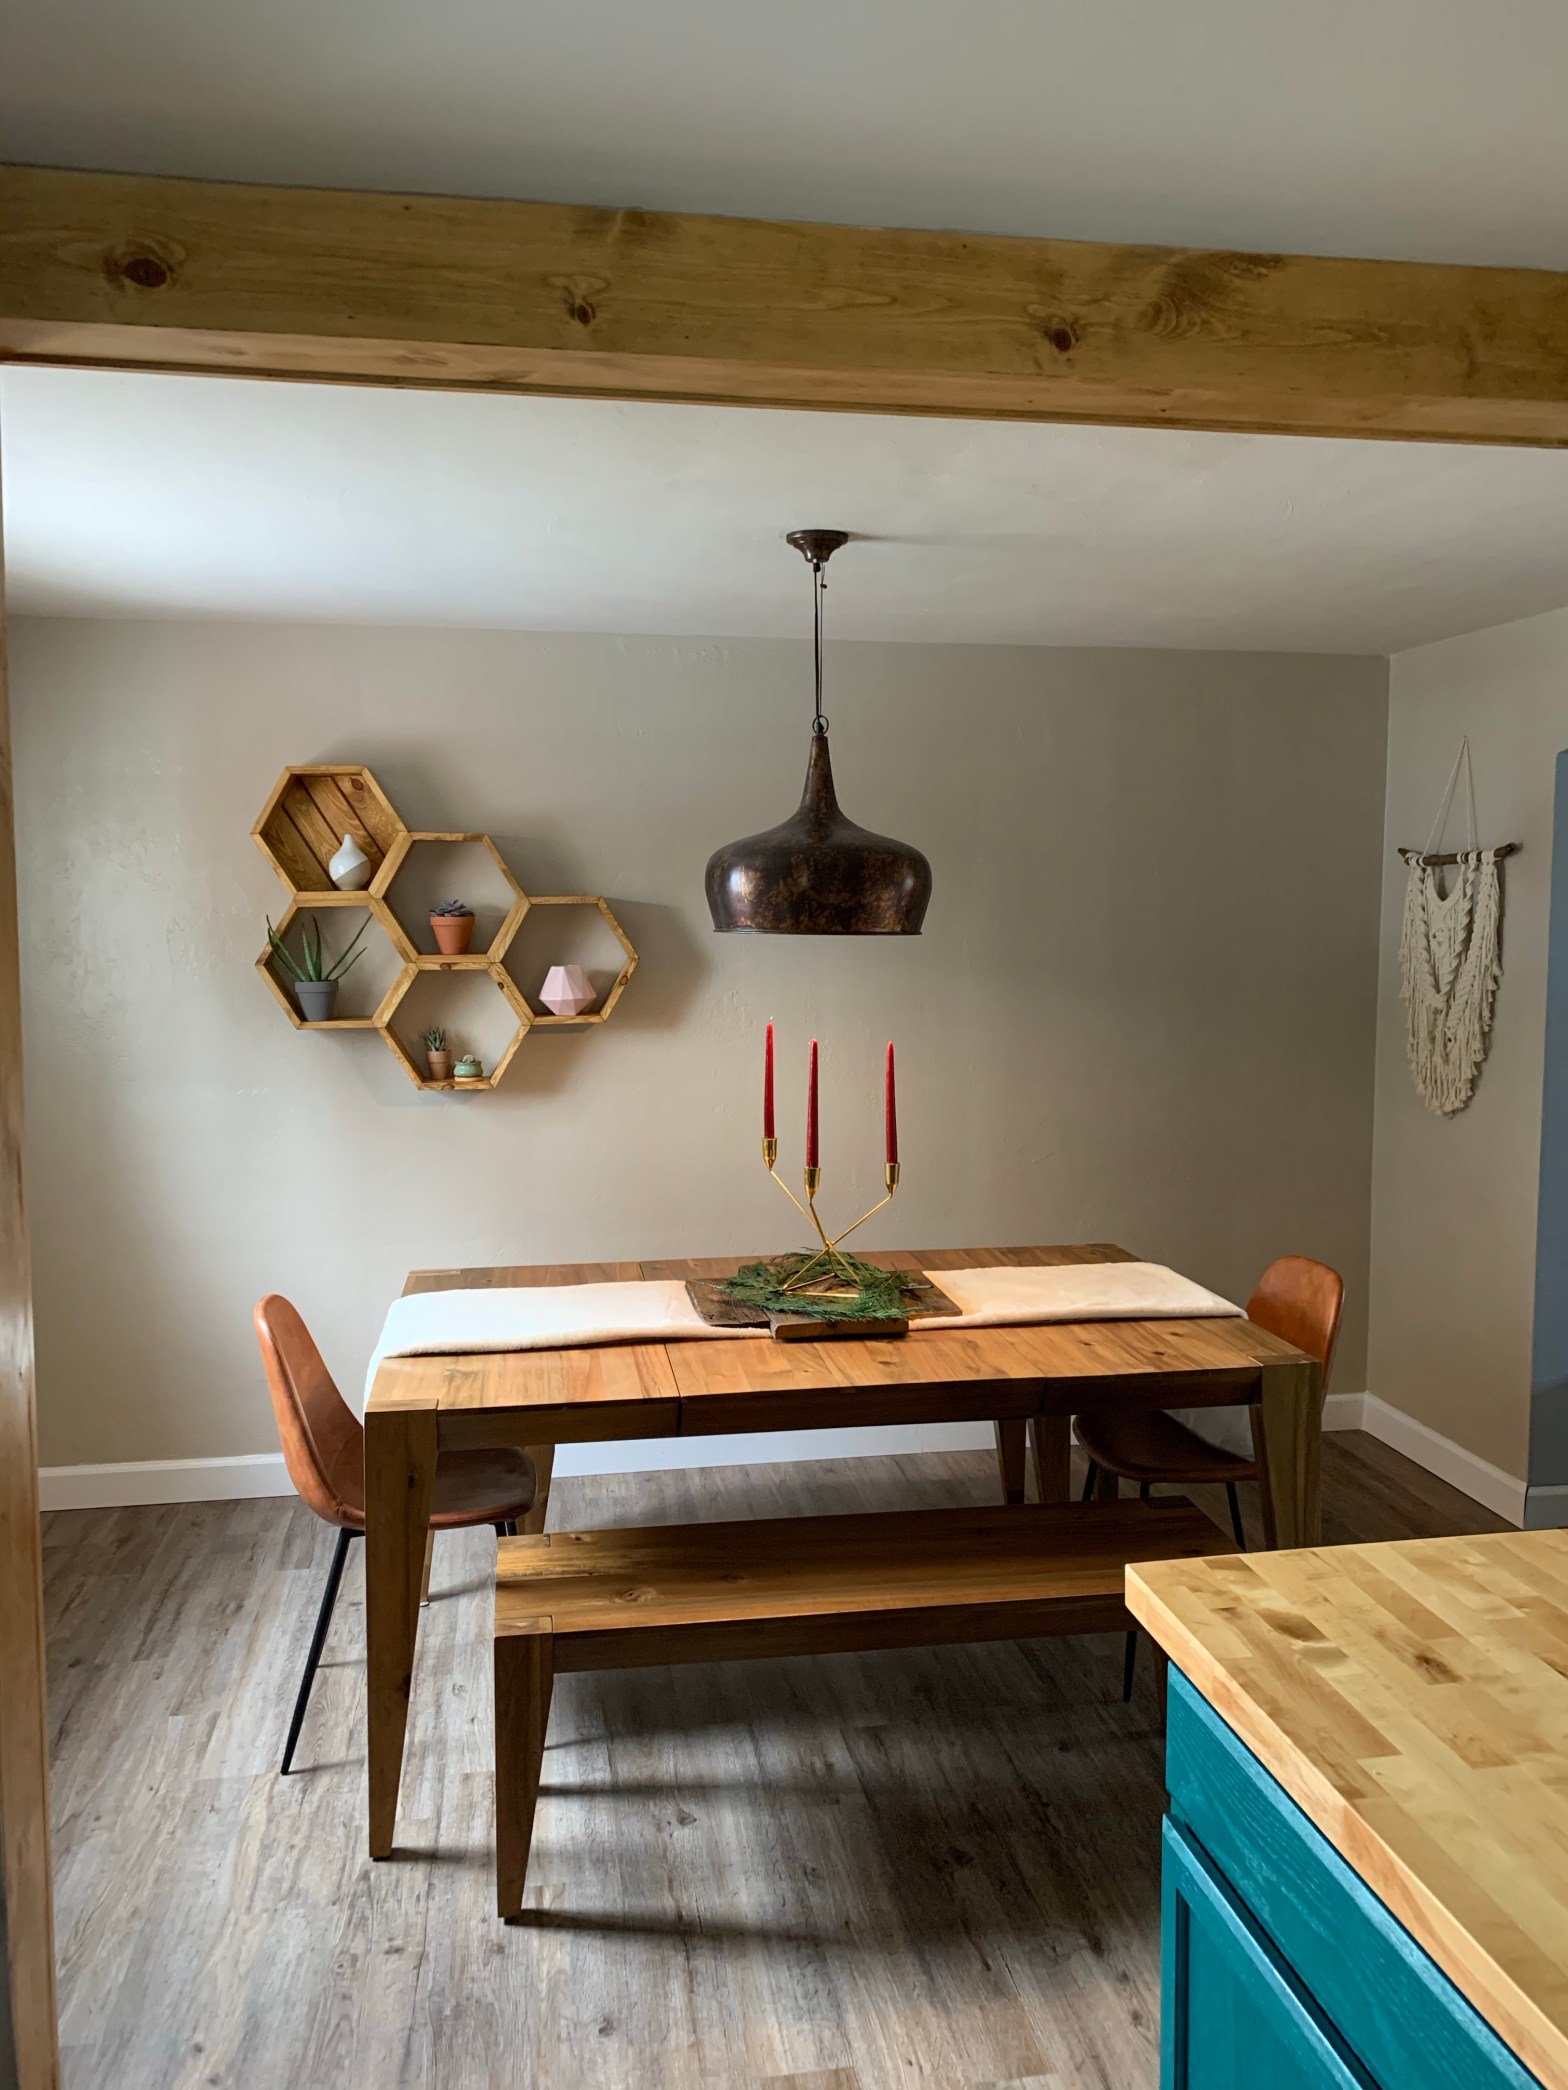
The Decor
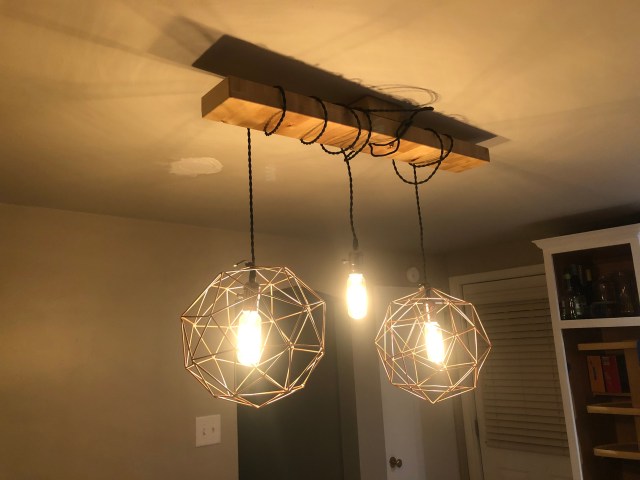
My favorite part of the entire project was picking out new furniture and decorations. It’s crazy how small touches, like lighting, can change the entire ambiance of the room. We created our own light above the island using a small piece of butcher’s block we had leftover and two geometric globes from our wedding backdrop we spray-painted copper. The picture I have was taken early on so the black wiring is wonky, but don’t worry, we fixed it. And of course, my talented dad made us hexagon shelves for all the succulents I snag from Aldi and Trader Joe’s far too often!
After months of saying, “we’re almost done,” we are FINALLY done. And I love seeing how far we’ve come. It’s one of my favorite places to be and I appreciate all the things our first renovation taught me — like which things I never want to do again and will most definitely be picky about when searching for our forever home 🙂 Thanks for keeping up!